
QT Battery
This section deals with the technical aspects of the QT battery
Warning
Connecting polarity incorrectly will result in irreparable damage to the battery, as well as to the controller and possibly also to the the motor.
Do not perform the battery connection if you are not familiar with electronics.
You will need a voltmeter in order to verify that the integrity of this operation!
You will also need a two-core electrical cable capable of handling 22amps, such as 3mm square!
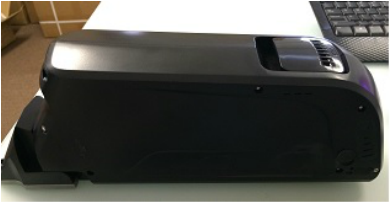
This is the whole battery, showing the actual battery (top portion) connected to the mounting base (bottom portion)
|
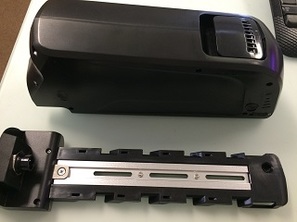
Turn the key in the base and slide the battery off the mount
The mount shows drilled out grooves, which are used to mount the base to the bicycle
Ensyre that you use lock tight on the mounting bolts to ensure that the mount does not rattle loose
|
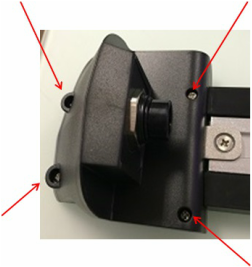
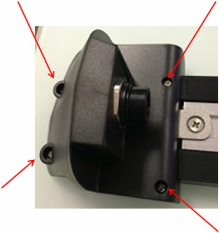
To connect the electrical cable you'll need to unscrew the four shows as indicated above
|
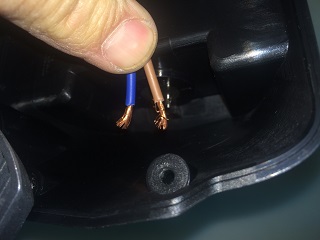
Most important:
BROWN = RED = +VE (positive)
Ensure you connect the positive wire to the positive connector.
Hint remove the connector prior to soldering the the wires to the connector - this will make your job much easier
|
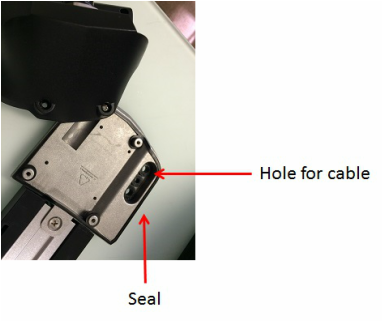
Ensure that the surrounding rubber seal is in place before replacing the lid of the rear compartment.
Use silicone if you wish to ensure that the seal remains in place.
There are holes in the base of the compartment. Pass the electrical cable through the last hole (as indicated in the picture above).
Hint - to make the job of passing the cable through the hole in such a way as not to force the rubber grommet out of position, dampen the cable with soapy water.
|
Hopefully you haven't lost the screws by now.
Screw the lid of the compartment back into place.
|
